

|
Proposal Submission For MATRICS
Click on the option Proposal Submission to see the submenu, as shown in Figure 3.1. The options available are:
Figure 3.1
Note: It is mandatory to fill in the "Mandatory Information " form in "User Profile" menu before filling "Form Submission" section of "Proposal Submission". If your profile is filled the dashboard will display that "your profile is ready for proposal submission".
Form Submission
Different details of proposal are to be filled in the format presented. Click on the Form Submission submenu (highlighted),as shown in Figure 3.2.
Figure 3.2
After selecting the submenu Form Submission from the menu, the form will appear, as shown in Figure 3.3. Select the scheme under which you want to submit the proposal.

Figure 3.3
On selecting the required scheme, the page will appear as shown in Figure 3.4.
Click on the button Start Proposal Submission" to go to Proposal Submission Form.
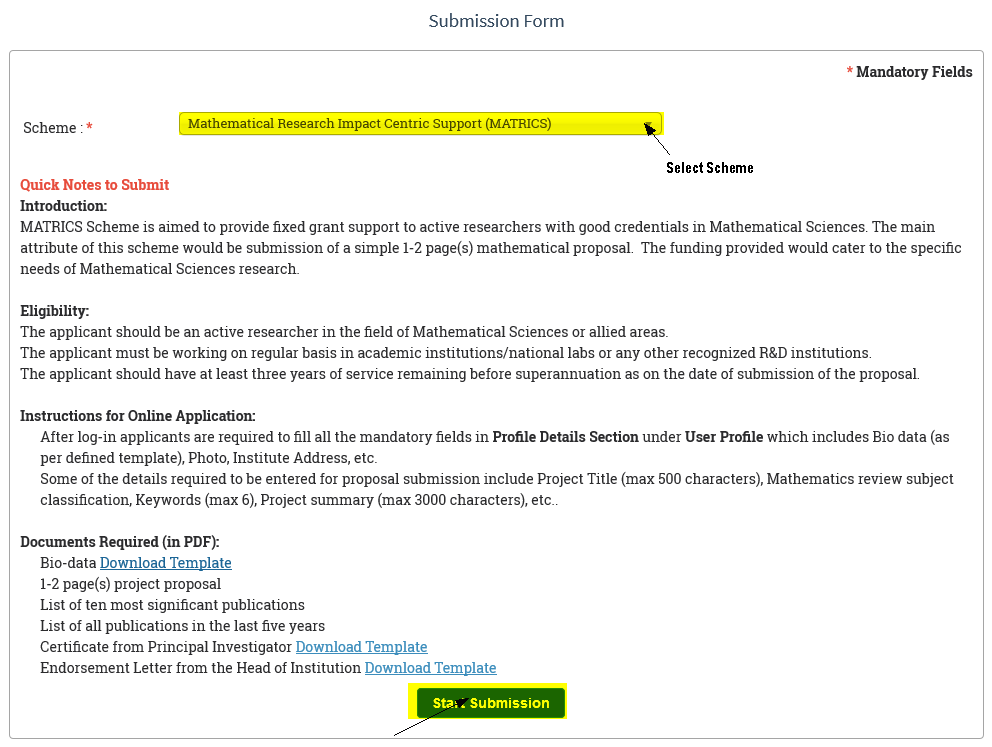
Figure 3.4
After clicking the button, the application form as shown in Figure 3.5 appears.
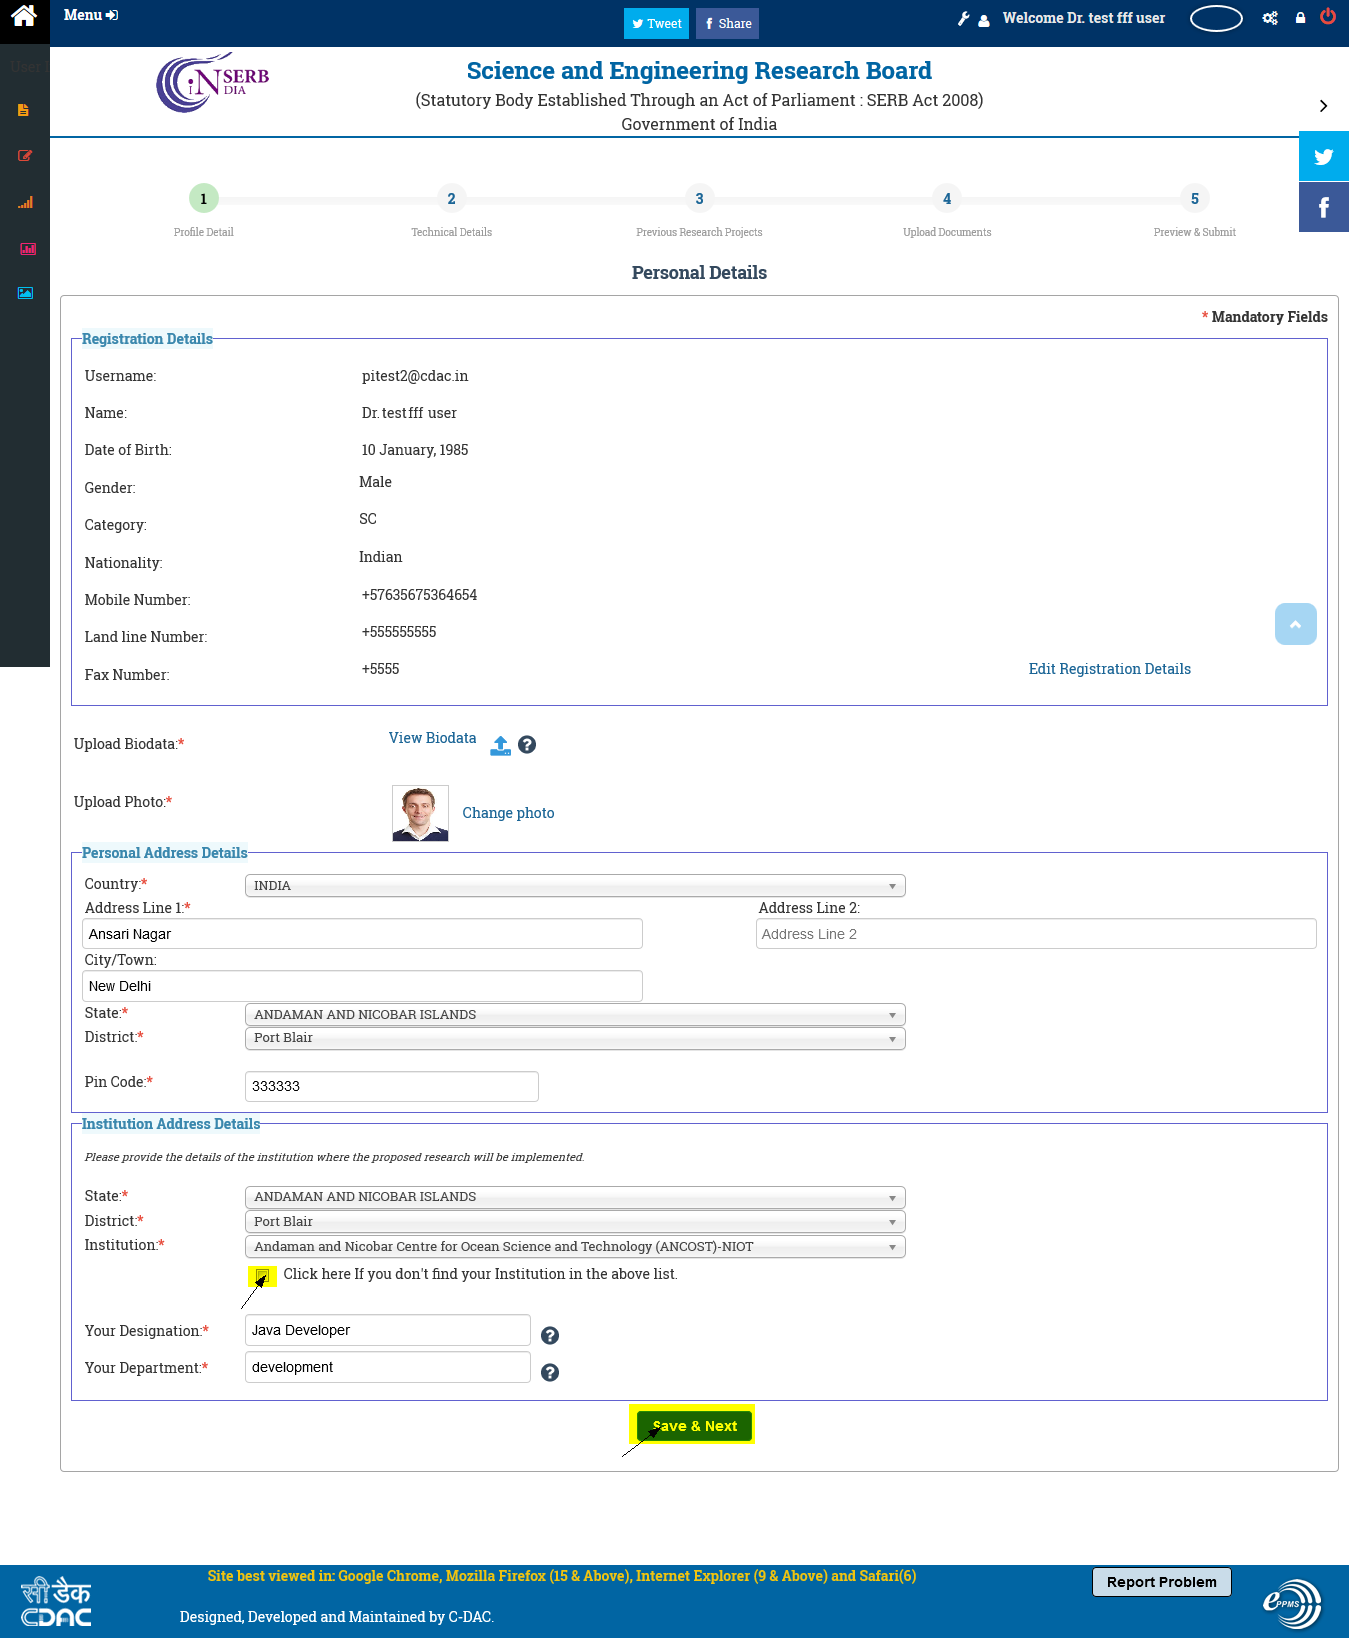
Figure 3.5
Click Check box if you don't find your Institution In the above list.
After clicking the Check box , the application form as shown in Figure 3.5.1.
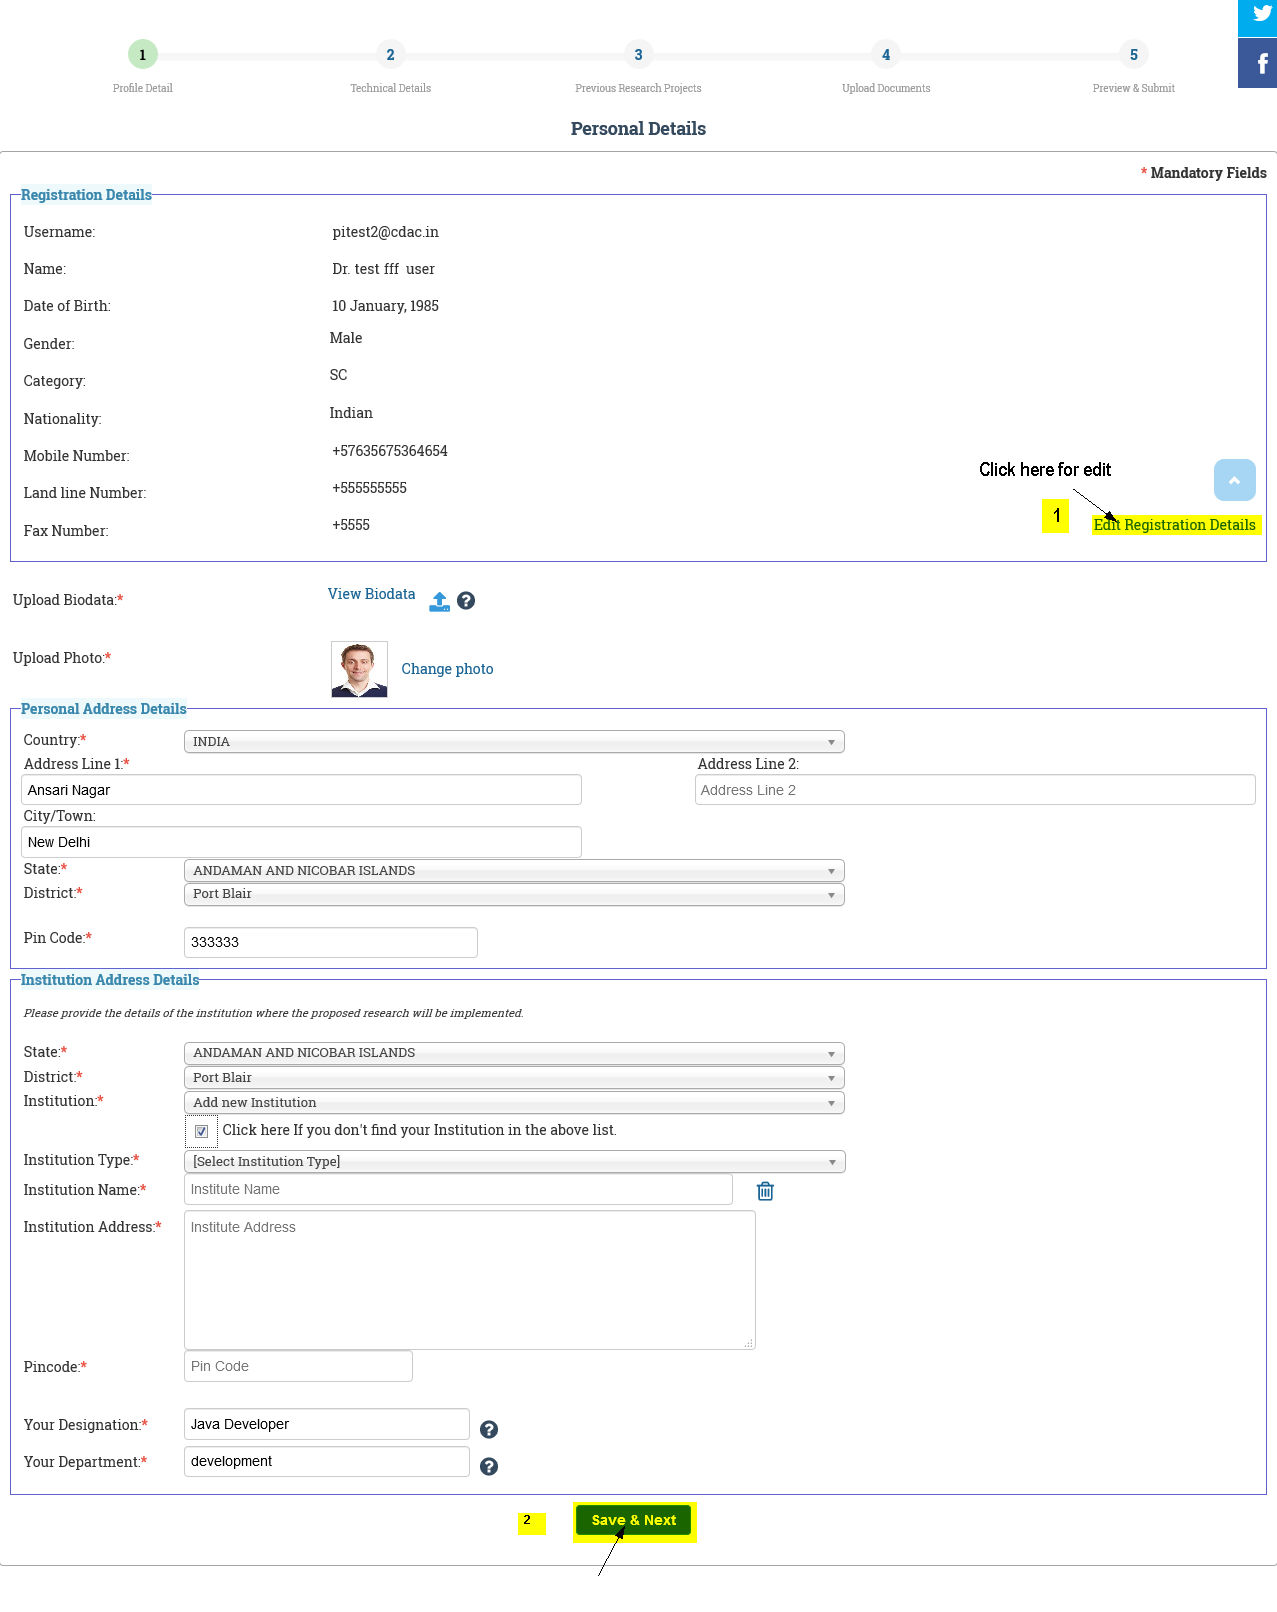
Figure 3.5.1
Case 1: -If you want to edit registration details Click Edit Registration Details link after edit details Click Save Button..
Case 2: If your Don't want to edit details then click Save & Next button, the application form as shown in Figure 3.6 appears.
Do you want to Mathematical Symbol Click Symbol .
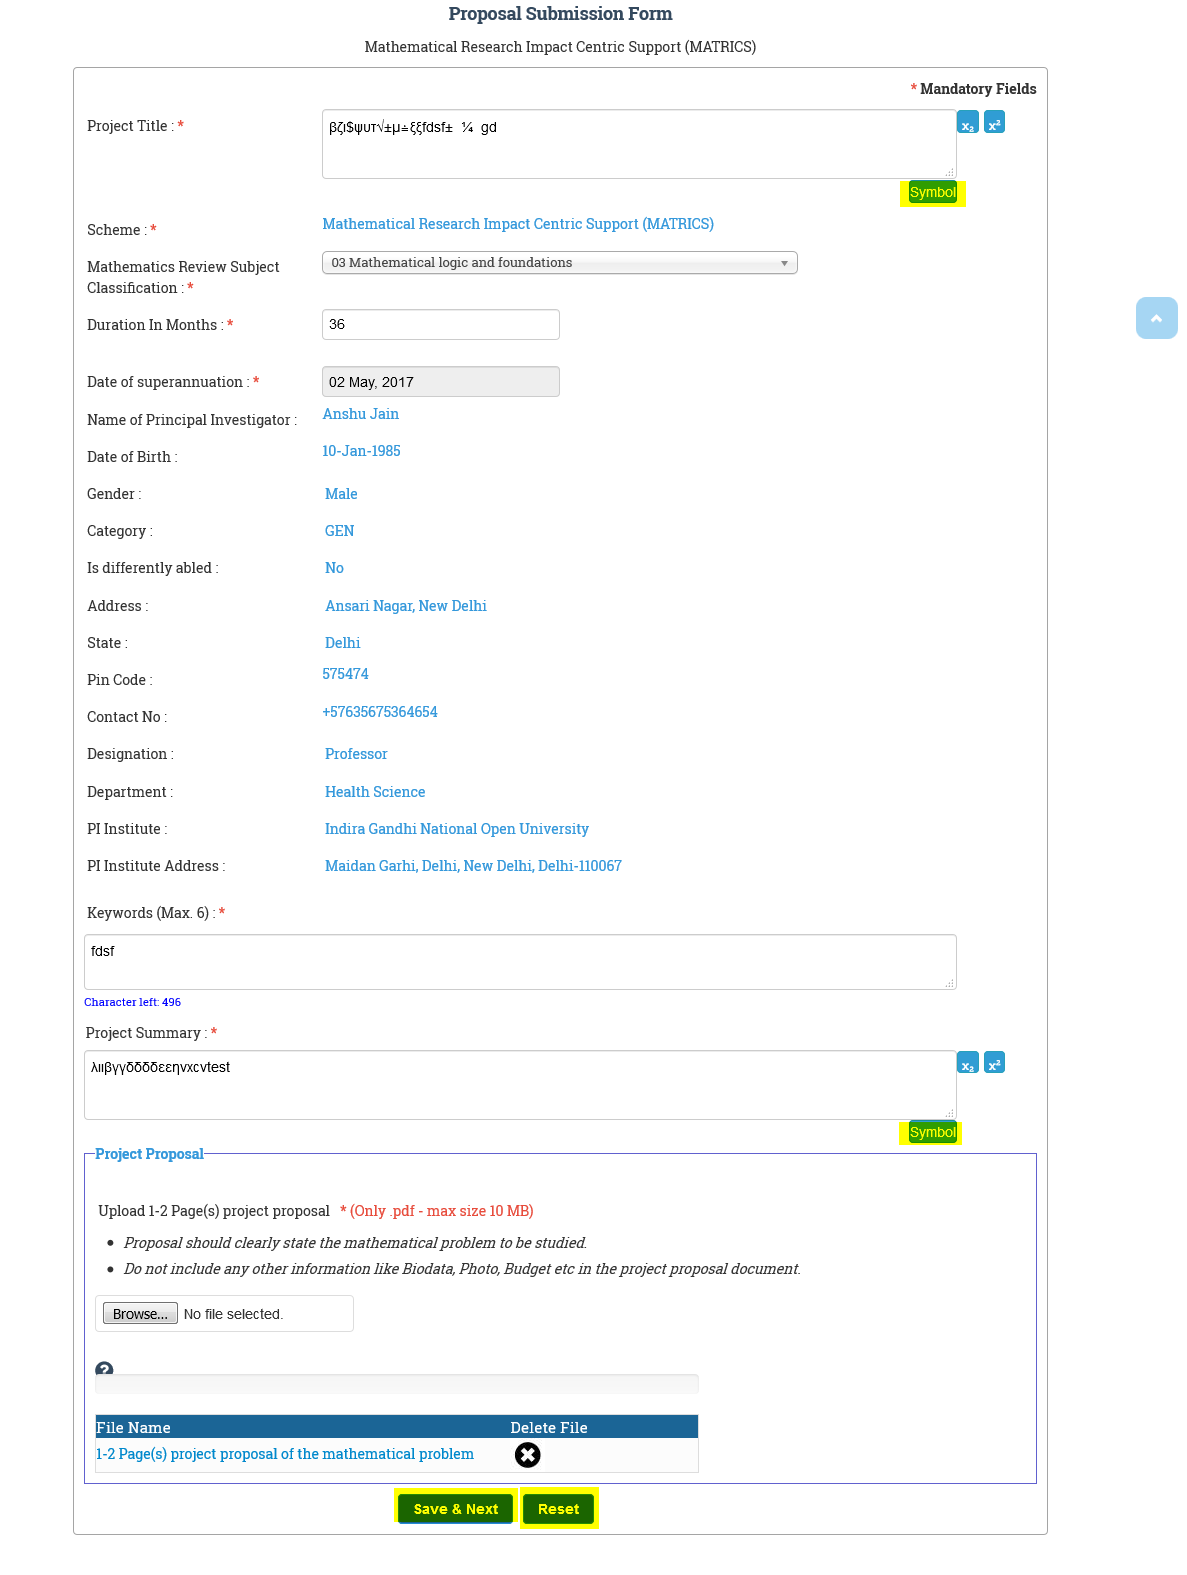
Figure 3.6
1.Click the
-
Save & Next : This button will take you to previous form.
-
Reset : This button resets all the fields of the form to default value.
-
Click the button Save & Next Shown in the Figure 3.7 The following Figure 3.6 shows the details and check Do you have any ongoing project SERB
Shows the figure 3.7 .

Figure 3.7
Case 1: Select 'No' only in case you do not have any Ongoing project funded by SERB. Then click on 'Next' button to proceed further.
Case 2: Should be selected in case you have any Ongoing project funded by SERB. Provide the details of such projects as shown in below Figure 3.8.
NOTE : Fields marked with red asterisk(*) are mandatory.
After filling all the proposal details,the Proposal Submission Form looks like as shown in Figure 3.8.
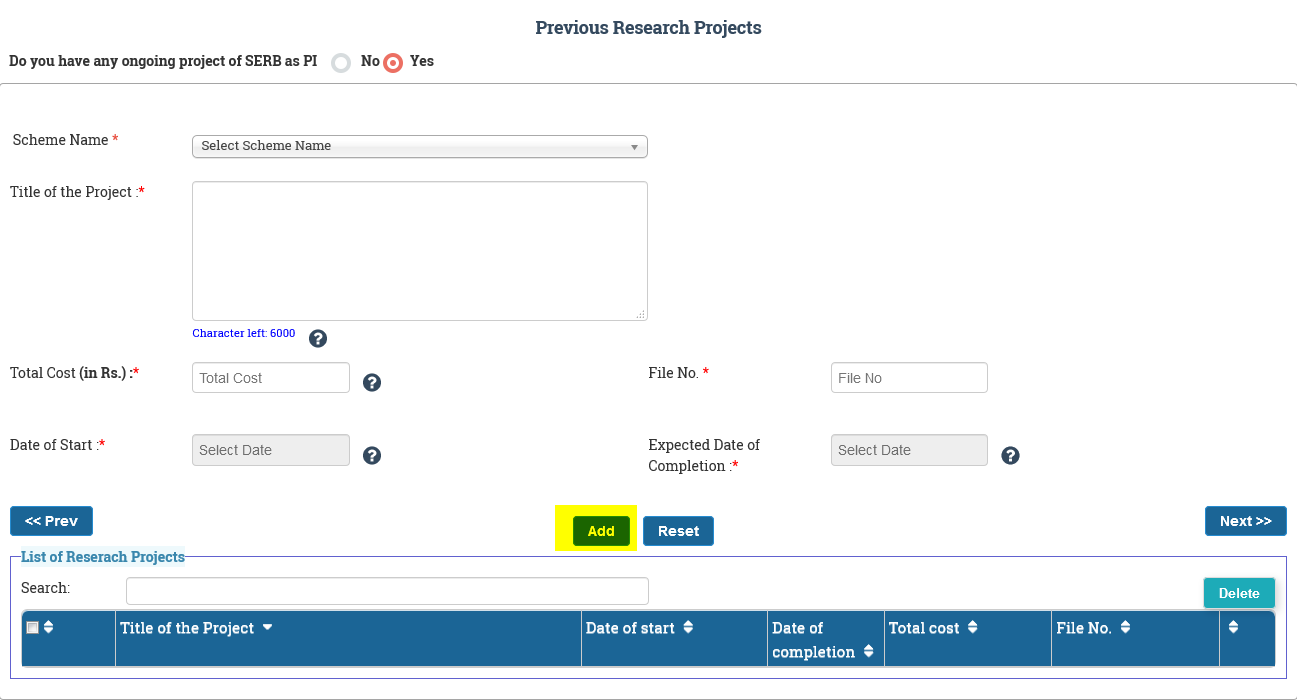
Figure 3.8
When you click on the Next button "Upload Documents" form will appear,as shown in Figure 3.9.
Upload Form :
The upload form will open on click of Next button of Upload Documents" . You have to upload all the listed document for submission of proposal. In case you do not have all the documents, edit it later while viewing full proposal. If all the documents are not submitted then the proposal will not be submitted. The page appears as shown in Figure 3.9.
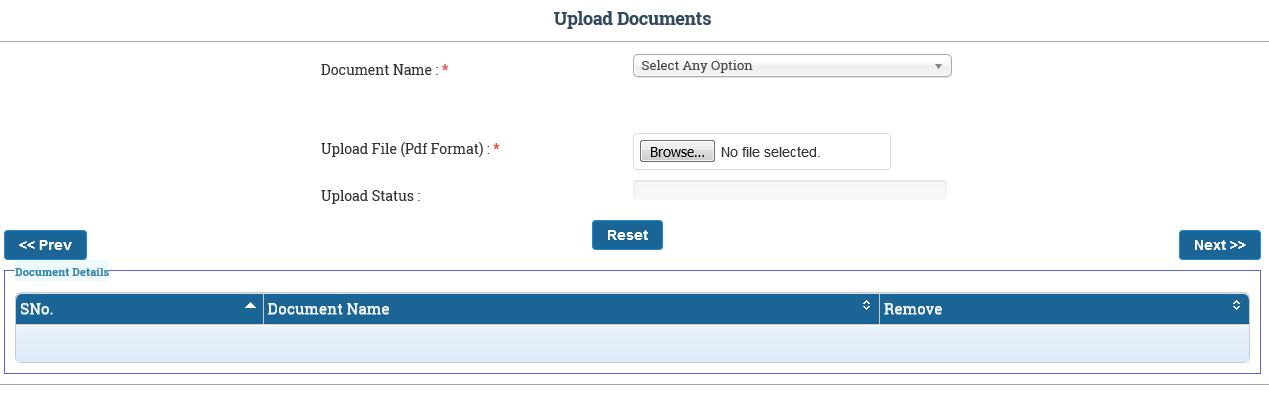
Figure 3.9
Select the name of the document from the drop down list of documents and upload file,as shown in Figure 3.10. The numbered features are as follows:
-
Add : You can select the document from the document name drop down and can upload it. As soon as upload is complete it will automatically populate in the table. In this way you can add all necessary documents one by one..
-
Document Name link : As soon as selected document is uploaded it is populated in the table. You can download the document by clicking on the Document name link.
-
Remove : You can remove the document if uploaded wrong.
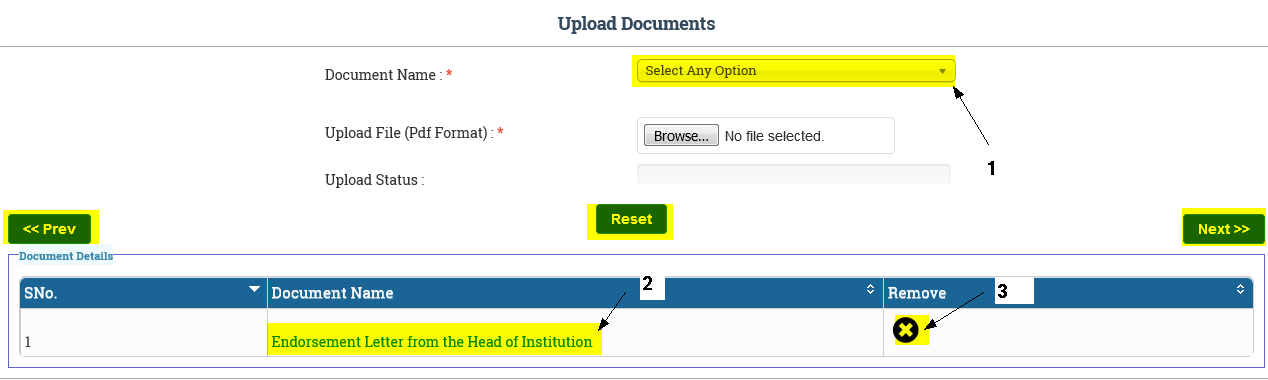
Figure 3.10
When you click on the Next button "Upload Documents" form will appear,as shown in Figure 3.10.
When you click on the Next button "Proposal Submission" Form will appear, as shown in Figure 3.11.
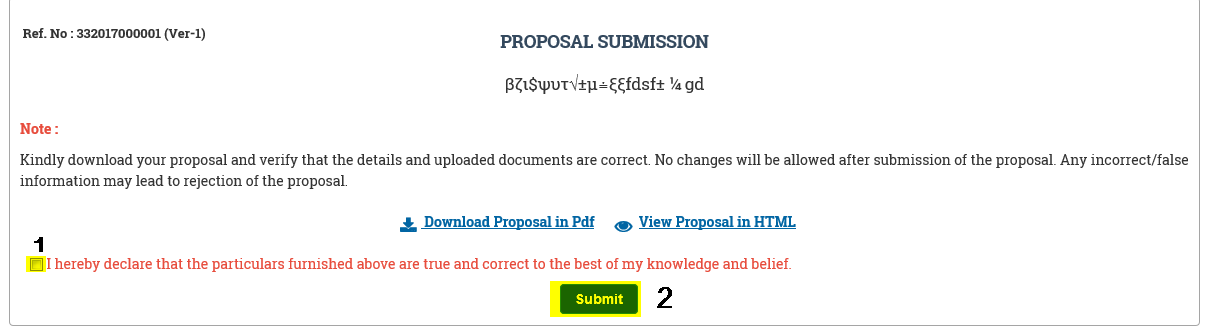
Figure 3.11
You can see your proposal by two different options, as shown in Figure 3.11:
- Download Proposal PDF :This will download the pdf of whole proposal containing different details and the documents submitted.
- View Proposal in HTML :This will open a pop-up window containing full proposal with different budget details and documents.
Check the declaration and click on Submit button, as shown in Figure 3.12.
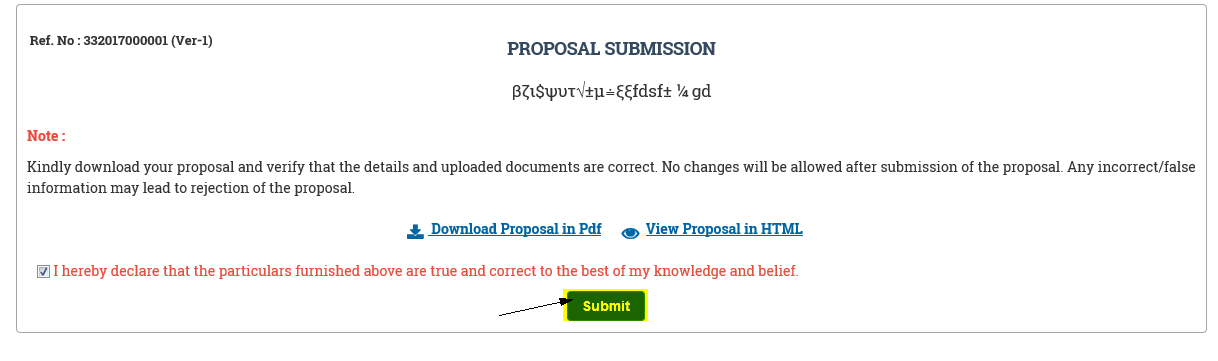
Figure 3.12
The details will appear in the table. You can Edit and Delete the added details as explained before. The new details can be added by entering new values and then saving them, they will also appear in the table, as shown in Figure 3.13.
Figure 3.13
Click on OK, and a pop-up message will display that your proposal is successfully submitted, as shown in Figure 3.13.
Figure 3.14
Saved Proposals :
Click on the Menu and select the Saved Proposal from the Proposal Submission to see the different proposals you have filled and saved but not submitted, as shown in Figure 3.15.
Figure 3.15
The page will appear as shown in Figure 3.16.
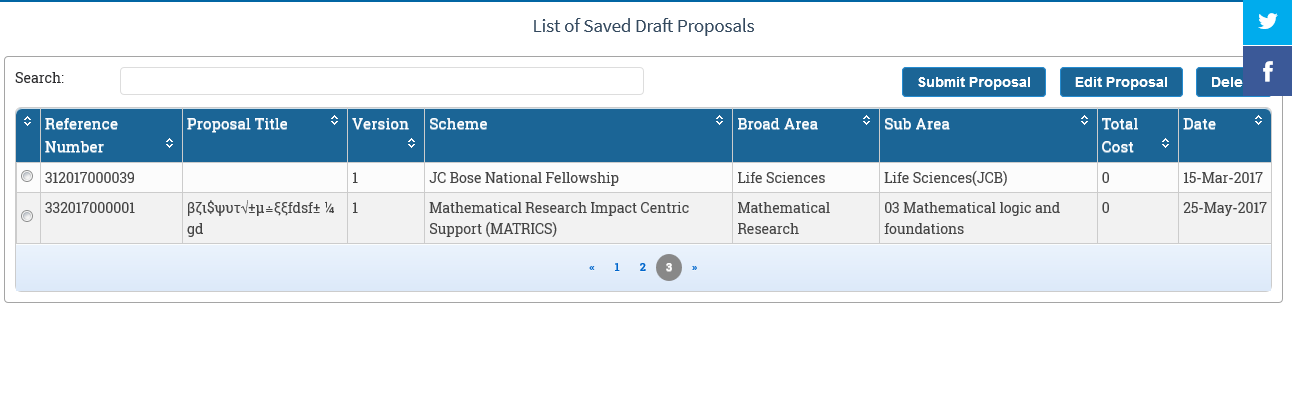
Figure 3.16
Select a proposal as shown in Figure 3.17. The numbered features are:
-
Submit Proposal :This will lead to submit proposal form.
-
Edit Proposal :This will open full proposal and you can edit different details from there.
-
Delete :This will delete the Proposal.
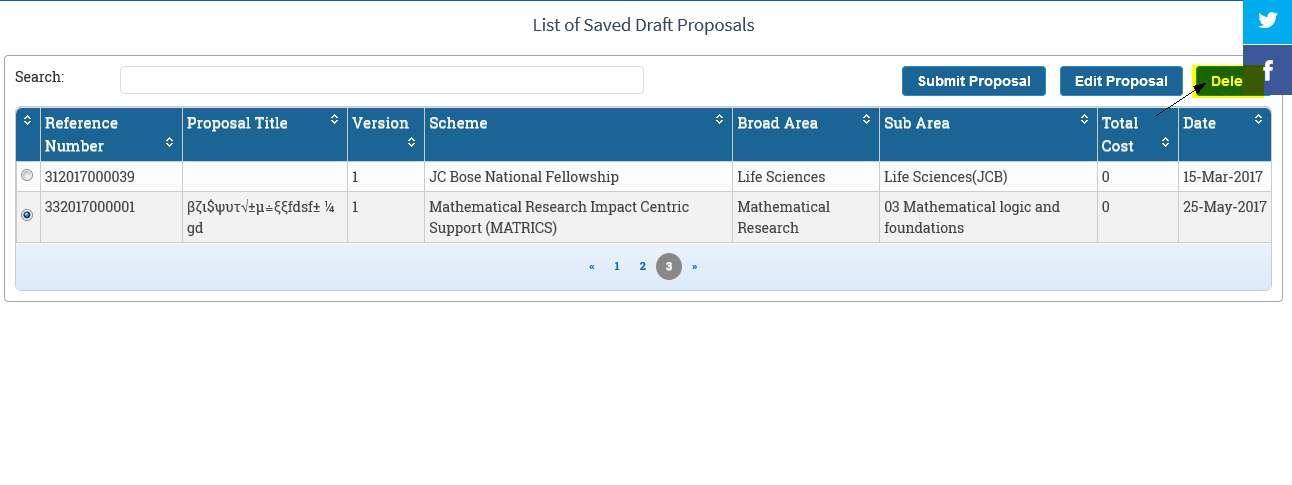
Figure 3.17
Submit Proposal :
Select the proposal to be submitted and click on the Submit Proposal button, as shown in Figure 3.18.
Figure 3.18
After selecting Submit Proposal, the page will appear as shown in Figure 3.19. Click on the checkbox and then on Submit button.
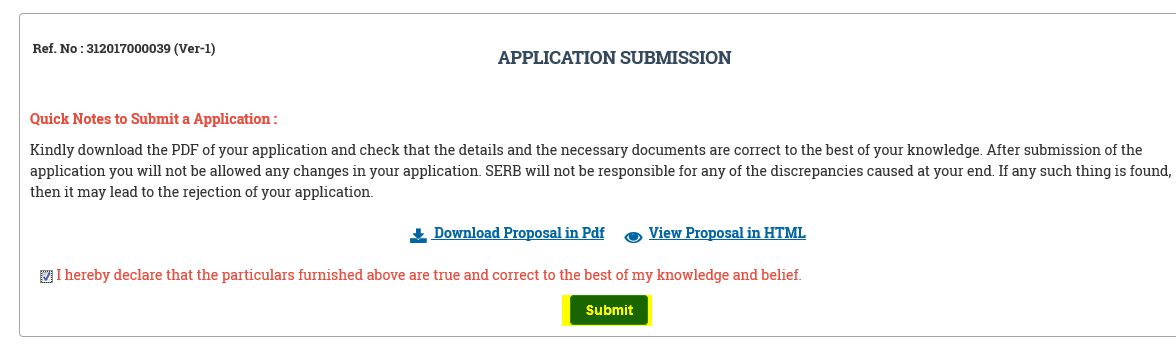
Figure 3.19
After submitting it will confirm for submission of proposal, as shown in Figure 3.20.
Figure 3.20
The pop-up message will display that your proposal has been submitted, as shown in the Figure 3.21.
Figure 3.21
Edit proposal :
Select the proposal to be Edited and click on the Edit Proposal button, as shown in Figure 3.22.
Figure 3.22
After selecting Edit Proposal button the page will appear,as shown in Figure 3.23. Different Edit buttons are displayed with respect to different details ,you can edit them by selecting the proper Edit button. After Editing select Review & Submit Proposal to submit proposal.
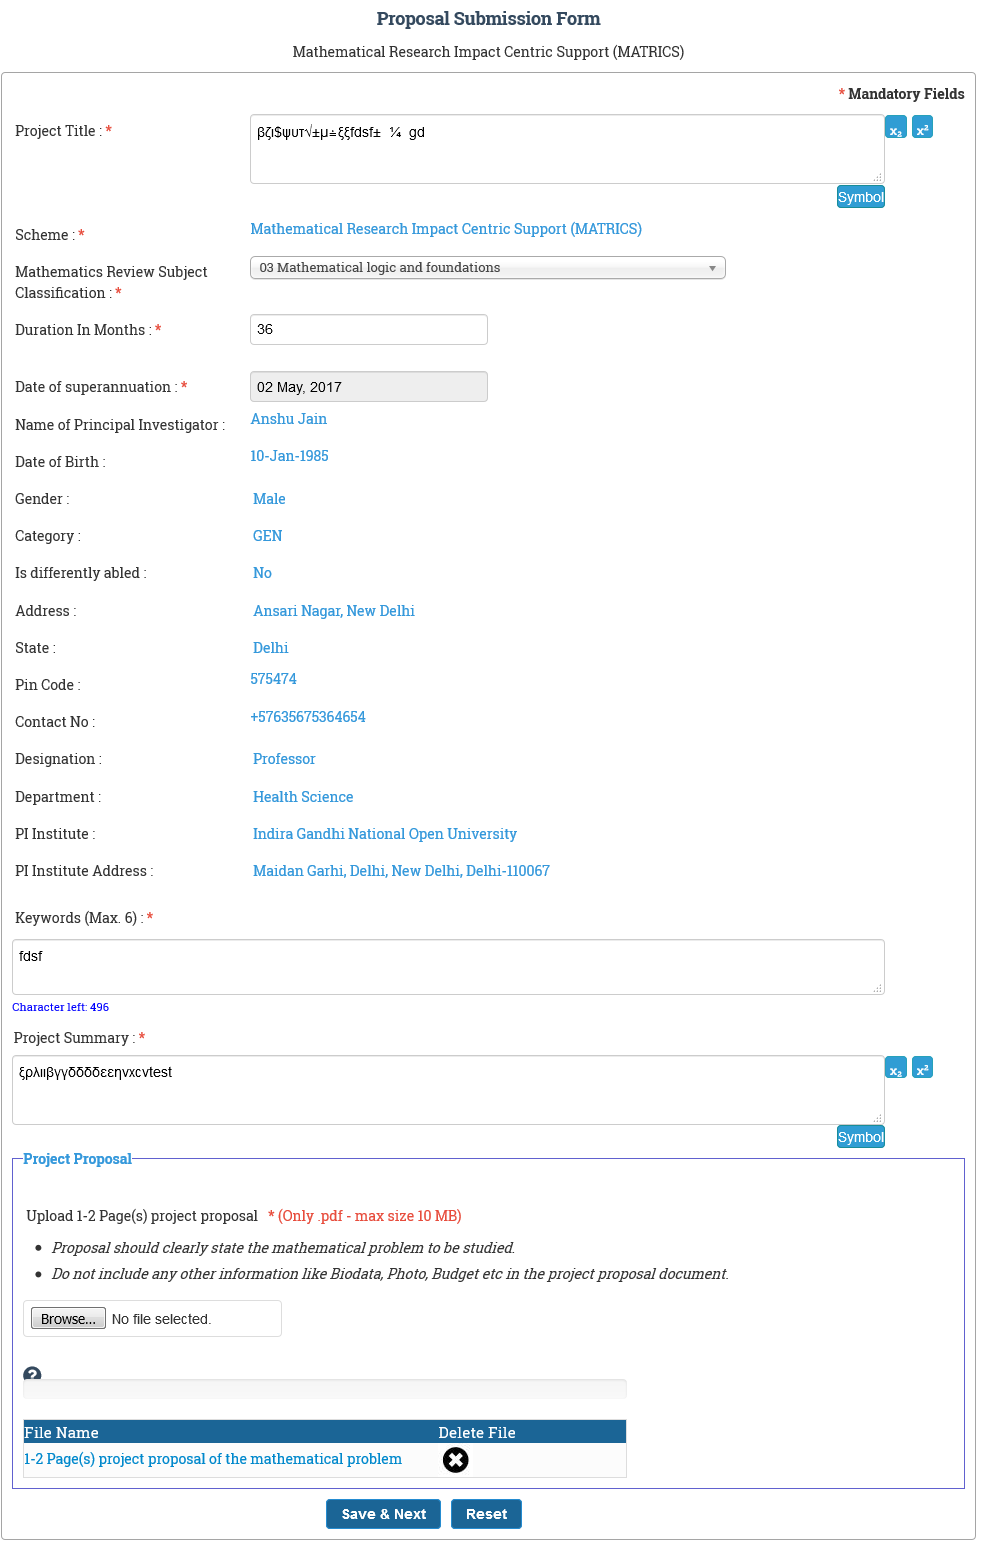
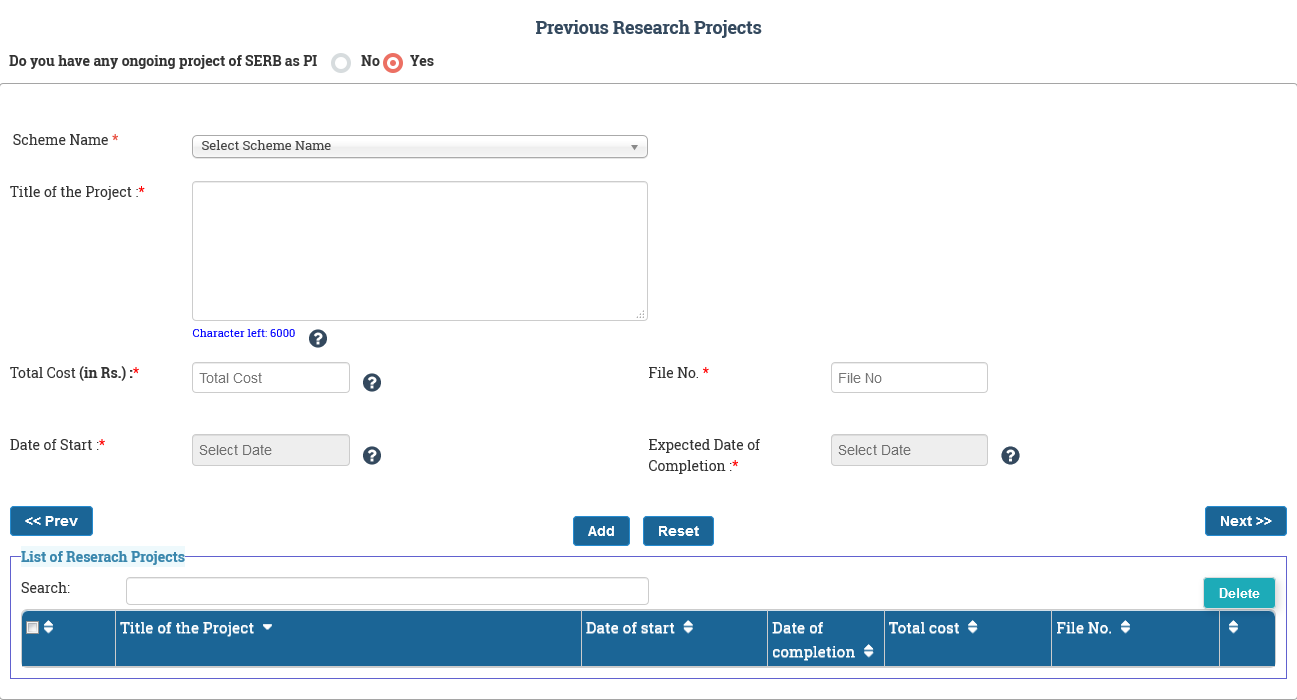
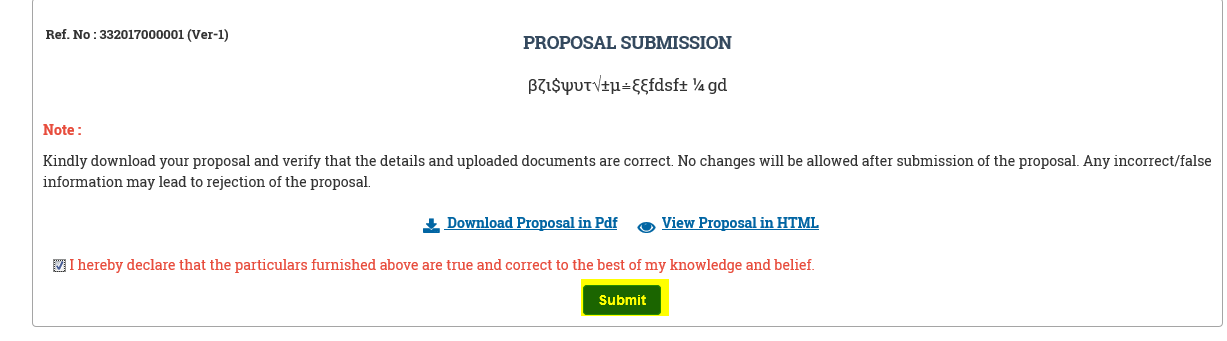
Figure 3.23
After selecting Submit , the page will appear as shown in Figure 3.24. Click on the checkbox and then Submit button.
After submitting, the page will ask for confirmation of form submission, as shown in Figure 3.25.
Figure 3.25
The pop-up message will display that your proposal has been submitted, as shown in the Figure 3.26.

Figure 3.26
Delete Proposal :
Select the proposal to be deleted and click on the Delete button, as shown in Figure 3.27.
Figure 3.27
After clicking on Delete, the page will ask for confirmation, as shown in Figure 3.28.
Figure 3.28
The pop-up message will display that your proposal has been deleted, as shown in the Figure 3.29.
Figure 3.29
View Submitted Proposal
Click on the Menu and select the View Submitted Proposal from the Proposal Submission to see the different proposals you have filled and submitted with their current status, as shown in Figure 3.30.
Figure 3.30
After selecting it the page will appear,as shown in Figure 3.31. The numbered features are:
-
Radio Button : This is used to select a particular proposal.
-
Proposal Name : This is a hyperlink which on click will display full proposal.

Figure 3.31
Select a proposal as shown in Figure 3.32. Click on the View Document button to display the list of documents submitted.
Figure 3.32
After selecting View Document button, a pop-up window will open containing the list of documents with their respective status for the selected proposal. The "right" mark shows that document is submitted and "cross" mark shows that document is not submitted, as shown in Figure 3.33.
Figure 3.33